
What this documentation covers
LaraSocial is a full social networking platform with feeds, profiles, stories, reels, chat, calls, live streaming, groups, pages, events, marketplace, wallet, points, gifts, blogs, forums, games, music, AI tools, and an admin workspace.
Install the platform
Download script.zip, upload the contents of script/ to the web root, rename htaccess.example to .htaccess, activate the Laravex license, and run the installer.
Configure operations
Set branding, modules, email, storage, video processing, live providers, social login, payments, frontend design, and admin controls.
Maintain updates
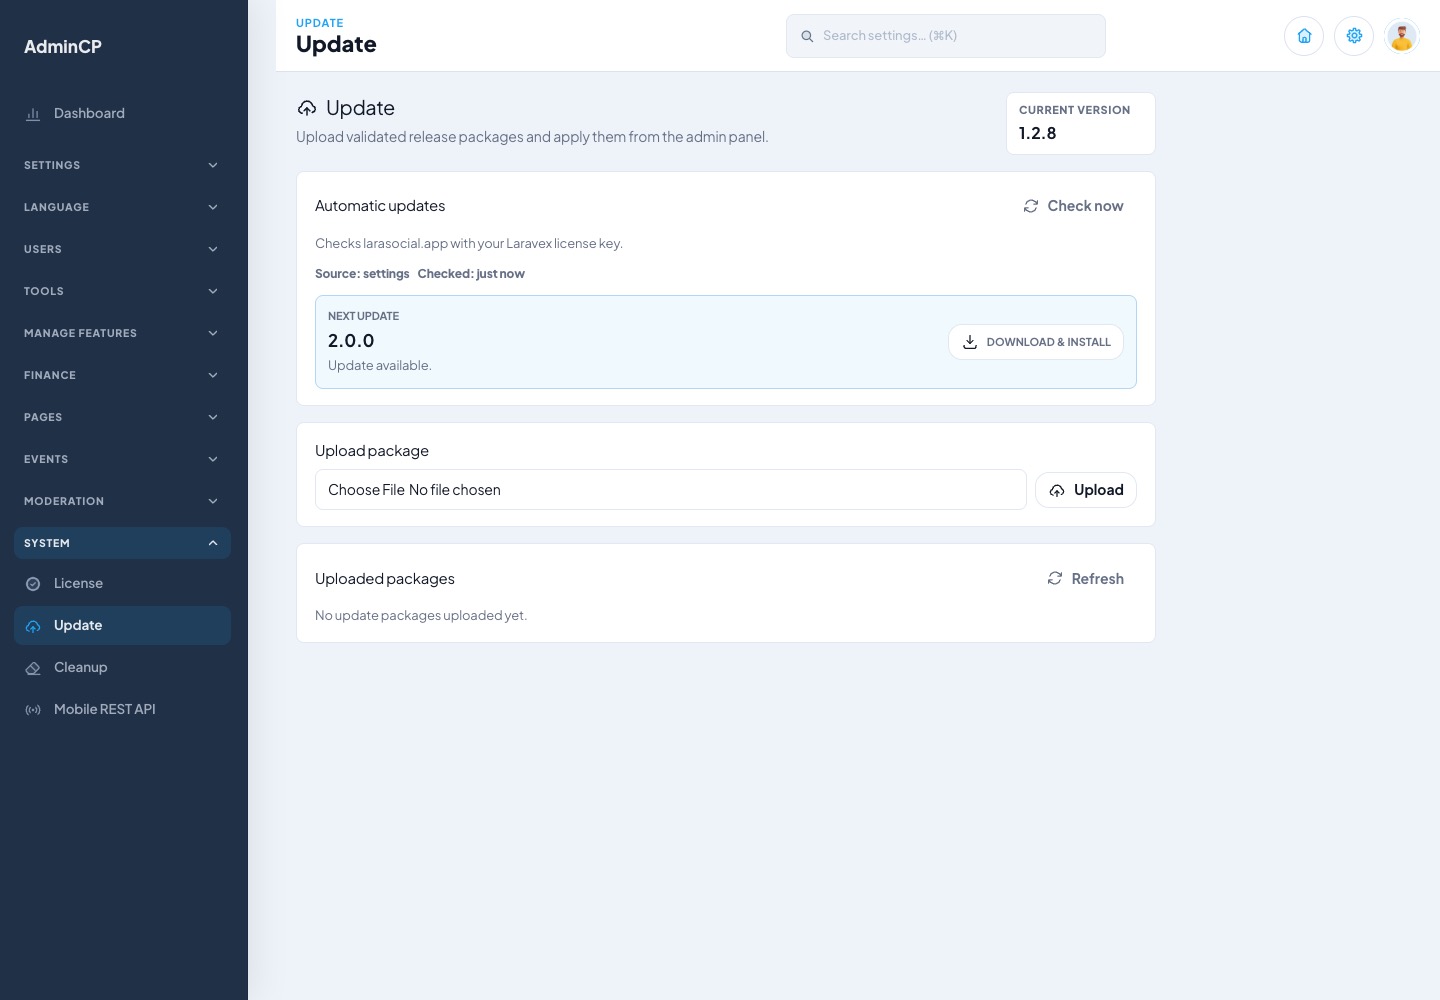
Use the licensed update center to fetch one chained update at a time, with checksums, backups, migrations, and changelog sync.
YOUR_LICENSE_KEY when documenting your own setup.
What comes in the Laravex download
After purchase, Laravex provides script.zip. Extract it on your computer first, then upload only the production web app files from the script/ directory to your hosting web root.
script.zip
|-- script/             # Production LaraSocial web app
|   |-- htaccess.example # Rename to .htaccess after upload
|   +-- ...             # Upload these contents to hosting
|-- Frontent/           # Frontend source for design and UI customization
+-- Mobile App/         # Mobile app source for Android/iOS builds
script/
This is the installable Laravel application. Upload the contents inside this folder to your domain web root, rename htaccess.example, then run the browser installer.
Frontent/
This is the editable frontend source. Developers can use it to customize layout, assets, styling, and user-facing design, then rebuild production assets.
Mobile App/
This contains the mobile app source used to prepare Android and iOS builds. Configure it after the web backend is installed and reachable over HTTPS.
Frontent/ or Mobile App/ into your public web root for a normal web installation. They are developer source folders, not required for the browser installer.
Server requirements
Use a modern PHP hosting environment with SSL, MySQL, writable Laravel directories, and enough resources for media uploads and background jobs.
| Item | Recommended value | Notes |
|---|---|---|
| PHP | 8.2 or newer | The installer checks PHP version before continuing. |
| Database | MySQL 8+ or MariaDB 10.6+ | Create an empty database and user before running the installer. |
| Extensions | PDO MySQL, OpenSSL, Mbstring, Tokenizer, XML, cURL, Zip, GD, Fileinfo, BCMath, Ctype, JSON | All are displayed on the system check screen. |
| Web root | script/ contents uploaded to your web root | On shared hosting, rename the packaged htaccess.example file to .htaccess. On VPS/custom vhosts, you may point the domain directly to Laravel's public directory. |
| Writable paths | storage, bootstrap/cache, .env, public/storage | The installer verifies these paths before license activation. |
| Queue and cron | Enabled | Needed for emails, notifications, media jobs, updates, and recurring tasks. |
| FFMPEG | Installed and executable | Required for video conversion, thumbnails, audio/video processing, and advanced media workflows. |
Recommended PHP limits
memory_limit = 512M
upload_max_filesize = 128M
post_max_size = 128M
max_execution_time = 300
max_input_time = 300Upload checklist
Complete these steps before opening the installer. Most 500 errors after upload come from uploading the wrong folder, missing .htaccess, missing permissions, a missing .env, or incomplete database credentials.
- Download
script.zipfrom Laravex and extract it on your computer. - Open the extracted
script/directory and upload the contents inside it to your hosting web root, such aspublic_htmlor the domain root. - Rename
htaccess.exampleto.htaccess. If your file manager hides dotfiles, enable "show hidden files" after renaming. - Create a MySQL database, database user, and password from the hosting panel.
- Make
storage,storage/app/public,storage/framework,storage/logs,bootstrap/cache,.env, andpublic/storagewritable. - Install SSL before final launch so OAuth callbacks, payments, webhooks, camera/microphone access, and secure cookies work correctly.
- Open
https://your-domain.com/installerand follow the installer screens below.
script/, not the parent folder itself. If you upload the parent folder, your installer may end up at /script/installer instead of /installer.
Useful Laravel commands after install
php artisan storage:link
php artisan optimize:clear
php artisan migrate --force
php artisan queue:restart
Cron job
* * * * * cd /home/YOUR_ACCOUNT/larasocial && php artisan schedule:run >> /dev/null 2>&1Installer walkthrough
The installer guides you through server checks, license activation, site/database configuration, and the final security reminder.
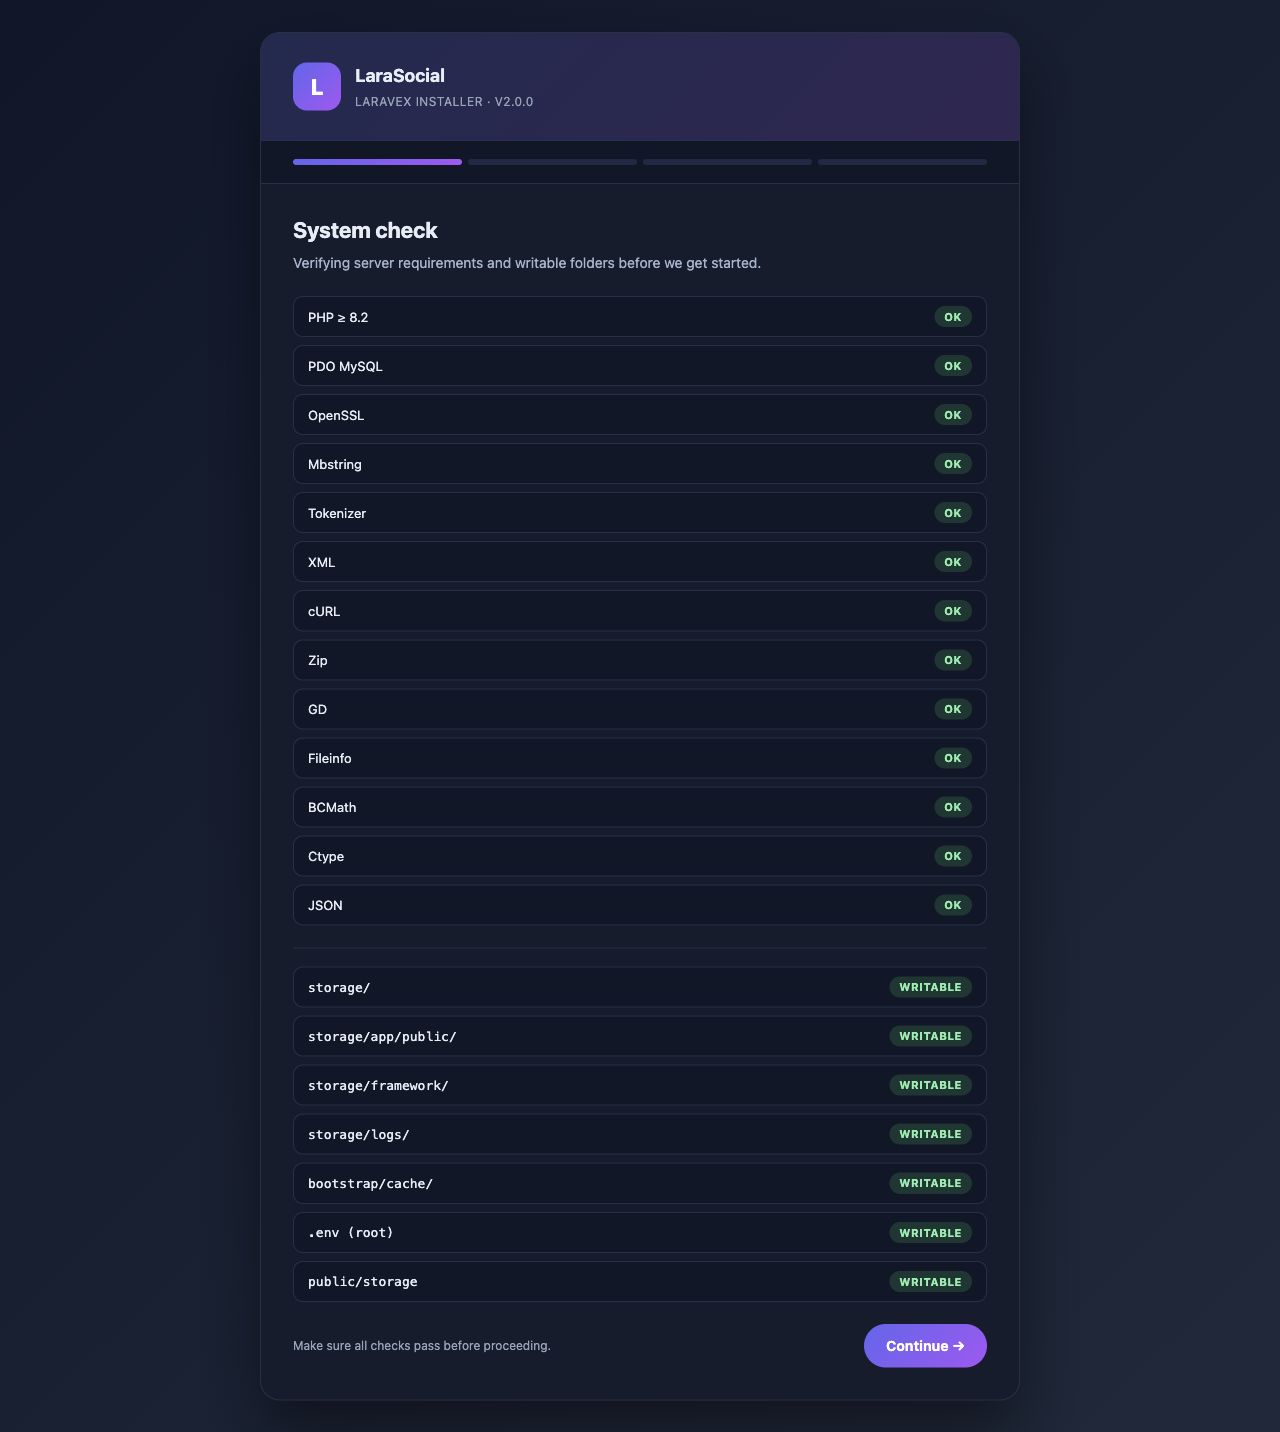
System check
Confirm PHP, required extensions, writable Laravel folders, the root .env, and public/storage. Continue only after every item shows OK or writable.
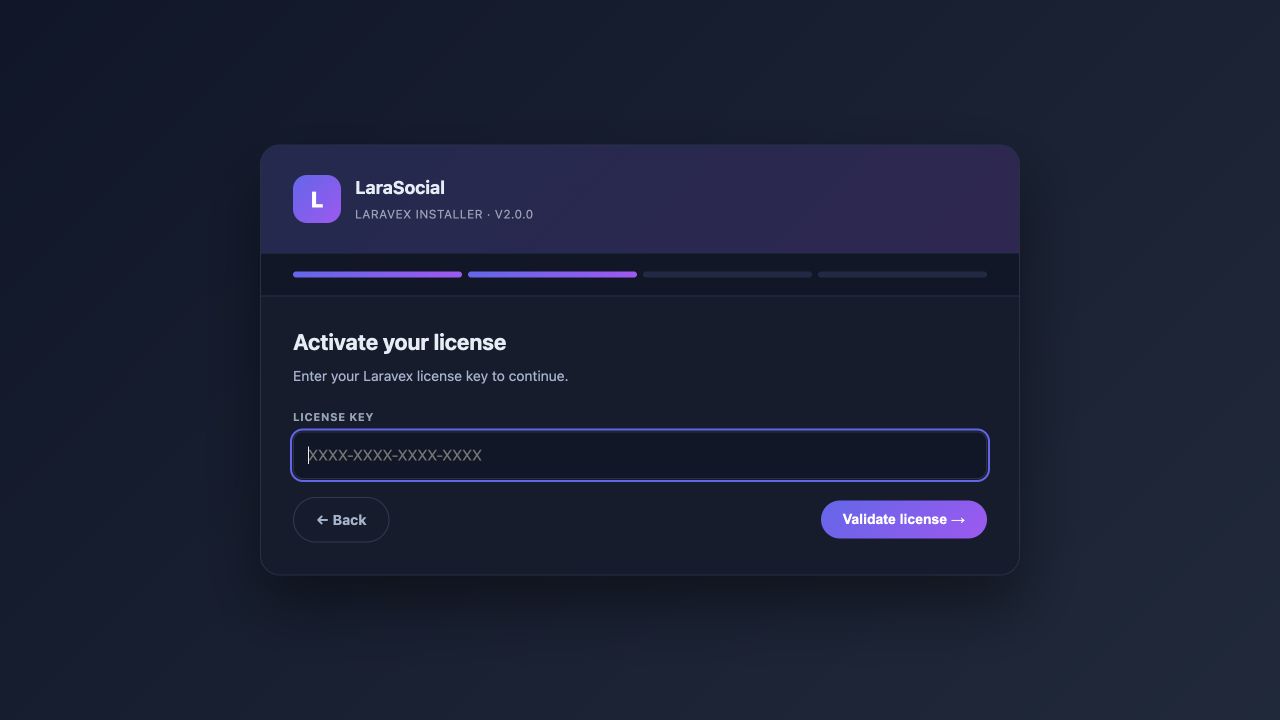
Activate the Laravex license
Enter the license key from your Laravex purchase. The installer validates the key with Laravex before unlocking the site and database configuration step.
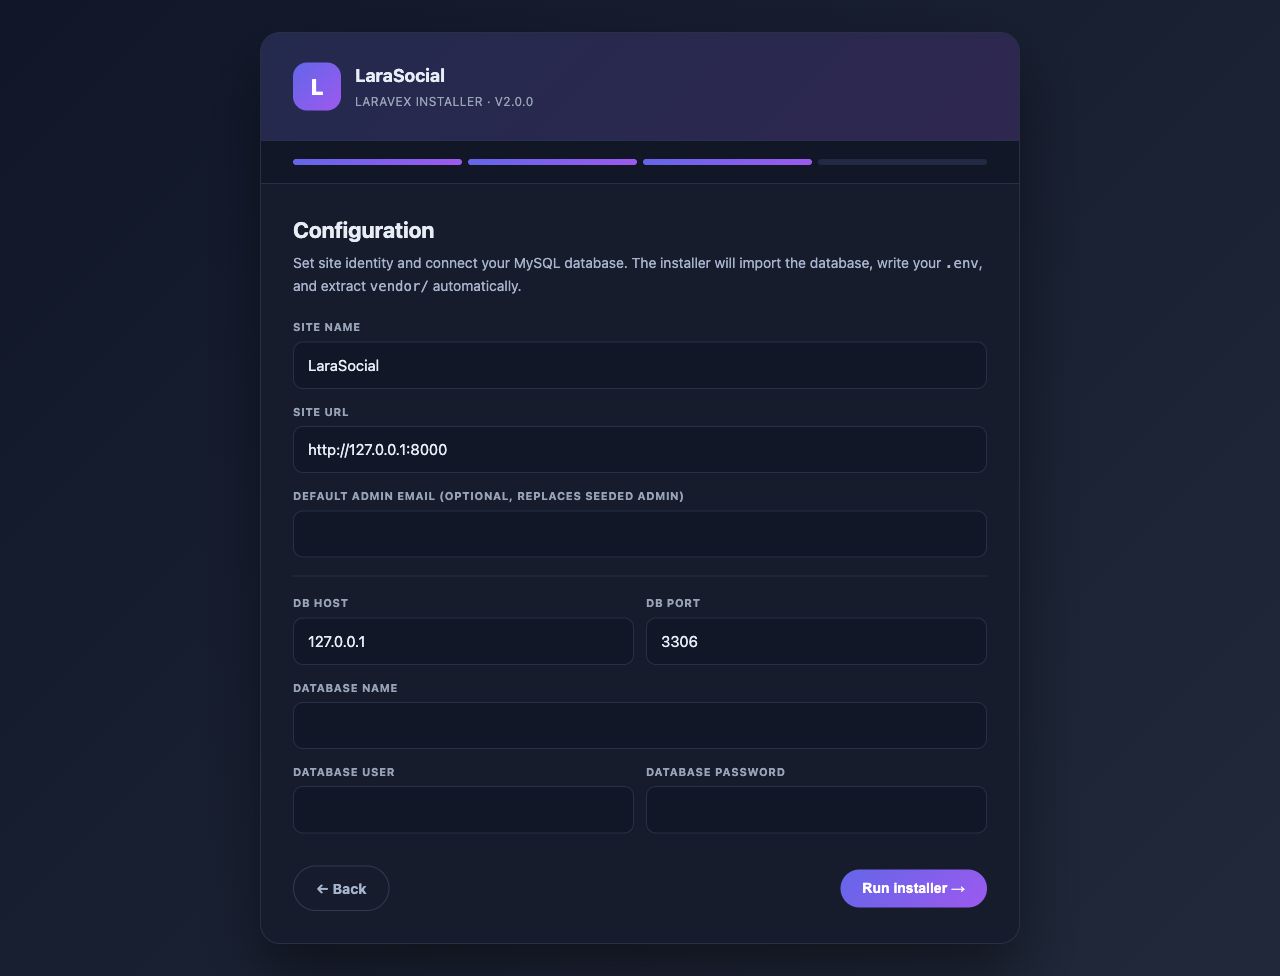
Configure site and database
Enter the site name, full site URL, optional admin email, database host, port, database name, user, and password. The installer writes .env, imports the database, and prepares the application.
Finish and secure the install
After installation, sign in with the seeded admin account or the admin email you provided, change the password immediately, and remove installer access before going live.
Admin settings
Open the admin panel after installation and complete the operational settings before inviting members.
Site identity
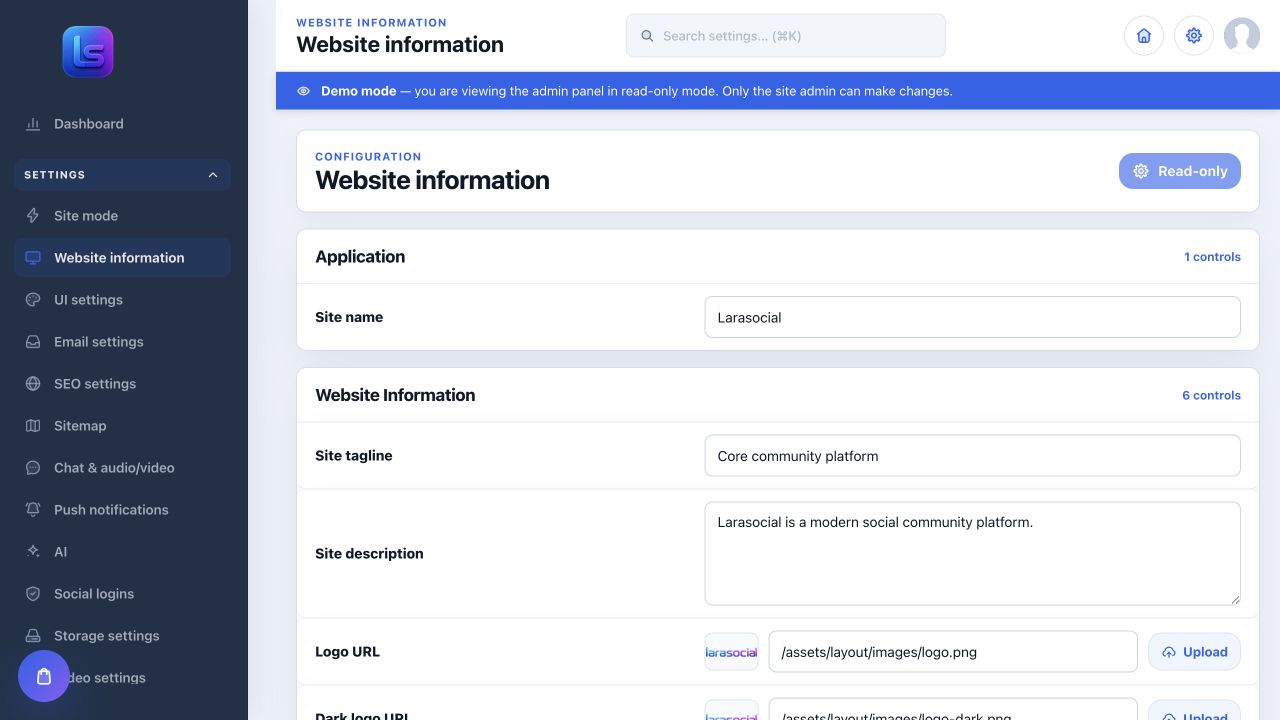
Set site name, logo, icon, brand colors, default language, timezone, SEO title, SEO description, and contact details.
Community modules
Enable or disable feeds, reels, stories, groups, pages, events, marketplace, blogs, forums, games, music, saved posts, albums, wallet, gifts, and points.
Safety and moderation
Configure registration, email verification, reports, blocked words, verification badges, maintenance mode, demo mode, audit logs, and admin roles.
Admin panel reference screens
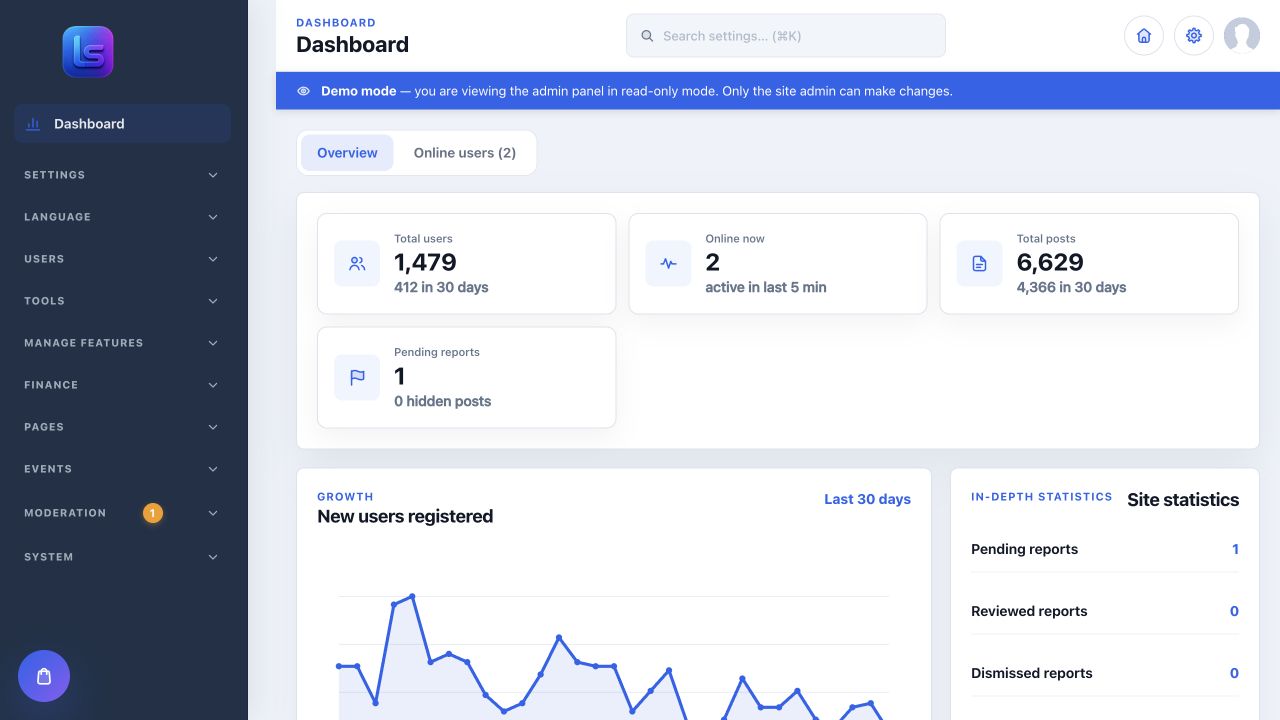
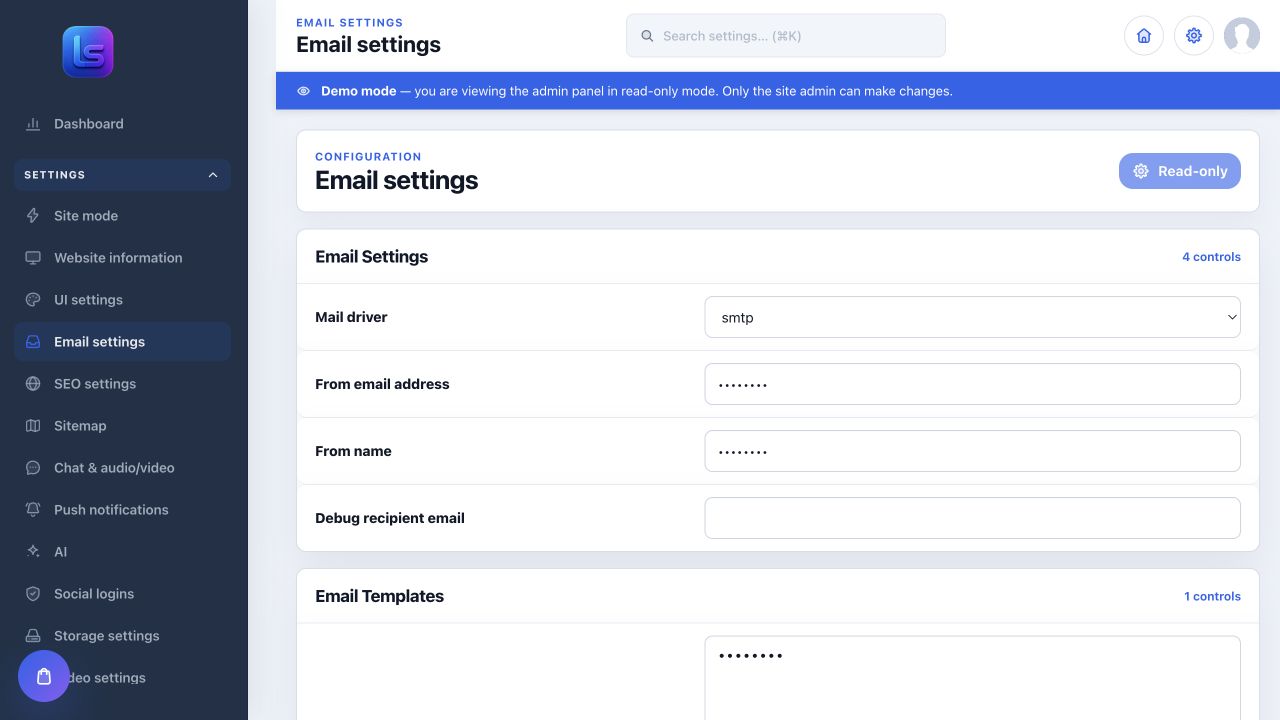
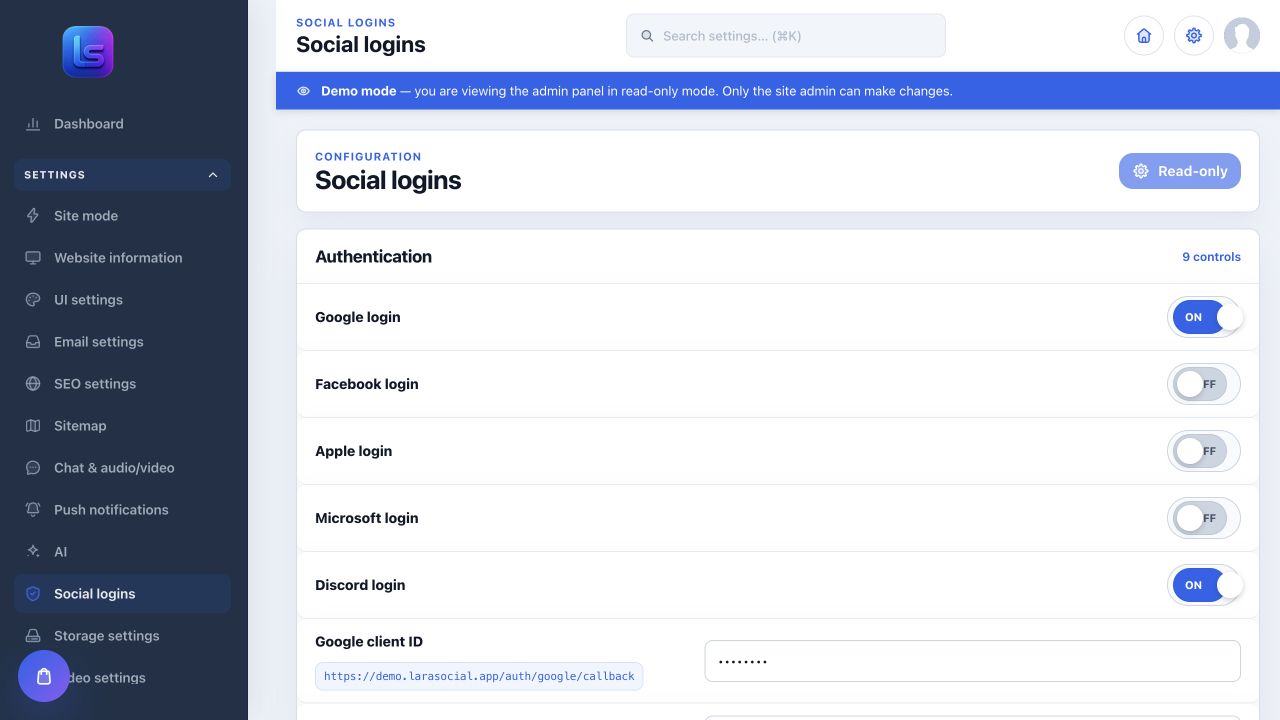
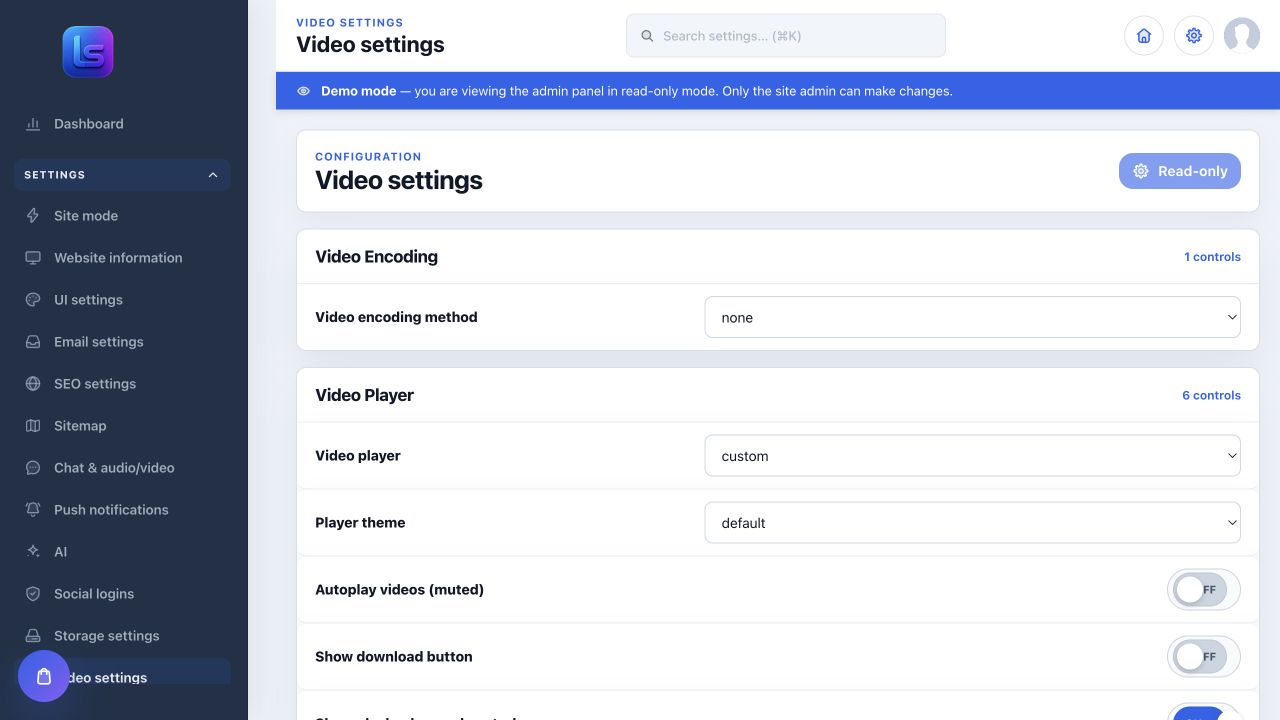
The demo admin panel is read-only, but it shows where operators manage growth metrics, branding, email, social login, video processing, and automatic updates.
Recommended first admin pass
- Change the seeded admin password and add a real admin email address.
- Upload final logos, icons, email branding, and default social share image.
- Review privacy, registration, profile visibility, wall review, and content moderation defaults.
- Configure media limits before users start uploading large files.
- Set up SMTP and send a test email before enabling email verification.
- Configure update/license settings so future releases can be applied from the admin update center.
SMTP email setup
SMTP is required for verification emails, password resets, notifications, contact replies, newsletters, and transactional messages.
| Field | Example | Notes |
|---|---|---|
| Mailer | smtp | Use SMTP unless you have a dedicated provider integration. |
| Host | smtp.your-provider.com | Provided by Titan, Gmail Workspace, Mailgun, SES, SendGrid, or your host. |
| Port | 587 or 465 | Use 587 for STARTTLS, 465 for SSL/TLS. |
| Username | no-reply@your-domain.com | Usually the full mailbox address. |
| Password | ******** | Use an app password if the provider requires it. |
| From name/address | Your Community / no-reply@your-domain.com | Must match or be authorized by your SMTP provider. |
| Reply-to | support@your-domain.com | Use a monitored support mailbox. |
Laravel-style environment fallback
MAIL_MAILER=smtp
MAIL_HOST=smtp.your-provider.com
MAIL_PORT=587
MAIL_USERNAME=no-reply@your-domain.com
MAIL_PASSWORD=your-mailbox-or-app-password
MAIL_ENCRYPTION=tls
MAIL_FROM_ADDRESS=no-reply@your-domain.com
MAIL_FROM_NAME="Your Community"FFMPEG setup
FFMPEG powers video conversion, thumbnails, audio processing, reels, stories, uploads, and richer media previews.
Install and verify
which ffmpeg
ffmpeg -version
which ffprobe
ffprobe -version
Admin configuration
Set the FFMPEG and FFprobe binary paths in the admin media/video settings. Common paths are /usr/bin/ffmpeg and /usr/local/bin/ffmpeg.
Common hosting requirements
- FFMPEG must be executable by the PHP user.
- Background workers should be running for heavier conversions.
- PHP upload limits must be higher than the largest video/audio upload you allow.
- Ask your host to allow required process functions if media jobs never start.
Realtime, notifications, calls, and live streaming
LaraSocial includes real-time social features. Configure the providers you plan to use before opening the platform to members.
Push notifications
Configure OneSignal, Firebase Cloud Messaging, or the notification provider exposed in your admin settings. Add web push keys and allowed domains.
Chat and websockets
Configure Pusher-compatible credentials, Soketi, or your websocket provider for typing, chat, counters, and live UI events.
Live video
Set up your chosen provider such as Mux, LiveKit, Agora, or RTMP/OBS. Confirm webhook URLs, callback secrets, and SSL.
Frontend design customization
The Frontent/ folder is included for developers who want to modify the LaraSocial web design, assets, layouts, and user-facing frontend experience.
What to edit
Use this folder for design changes, frontend components, public assets, layout images, sidebar icons, game assets, social icons, stickers, and theme work.
How to work
Install dependencies, run the development server, make changes, test responsive screens, then build production assets before uploading them.
What not to edit
Avoid editing minified production files directly if you want maintainable updates. Keep the editable Frontent/ source backed up or version controlled.
Typical frontend workflow
cd Frontent
npm install
npm run dev

# After changes are tested:
npm run build- Change logos, colors, images, pages, components, and module UI in the frontend source.
- Build the frontend before using it in production. Upload the generated production assets to the matching location in the installed LaraSocial web app.
- Clear browser, CDN, and Laravel caches after replacing production assets.
- Test desktop and mobile layouts after every major design change, especially feeds, profiles, stories, reels, admin pages, and module hubs.
Frontent. Use the package folder exactly as shipped when running commands or writing support notes.
Payments, wallet, and monetization
Configure payments before enabling paid marketplace listings, wallet top-ups, gifts, points redemption, ads, event payments, or withdrawal requests.
- Add payment provider public and secret keys in admin settings or environment variables.
- Set webhook endpoints in the provider dashboard and copy the webhook secret into LaraSocial.
- Run at least one sandbox checkout before switching to live mode.
- Define wallet rules, withdrawal review process, minimum payout, currency, points conversion, and refund policy.
- Keep marketplace moderation and reporting enabled if members can sell products or services.
Storage and CDN
Start with local storage for small launches, then move to S3-compatible object storage when media volume grows.
Local storage
Run php artisan storage:link, confirm public/storage resolves in the browser, and make sure backups include uploaded media.
S3-compatible storage
Use AWS S3, DigitalOcean Spaces, Wasabi, or compatible providers. Configure bucket, region, endpoint, key, secret, CDN URL, and visibility.
FILESYSTEM_DISK=s3
AWS_ACCESS_KEY_ID=your-access-key
AWS_SECRET_ACCESS_KEY=your-secret-key
AWS_DEFAULT_REGION=us-east-1
AWS_BUCKET=your-bucket
AWS_URL=https://cdn.your-domain.com
Mobile app development
The Mobile App/ folder contains the React Native / Expo source for a branded LaraSocial app. Connect it to your installed website, then produce an Android APK or Play Store AAB and an iOS build from the same source.
Enable the REST API
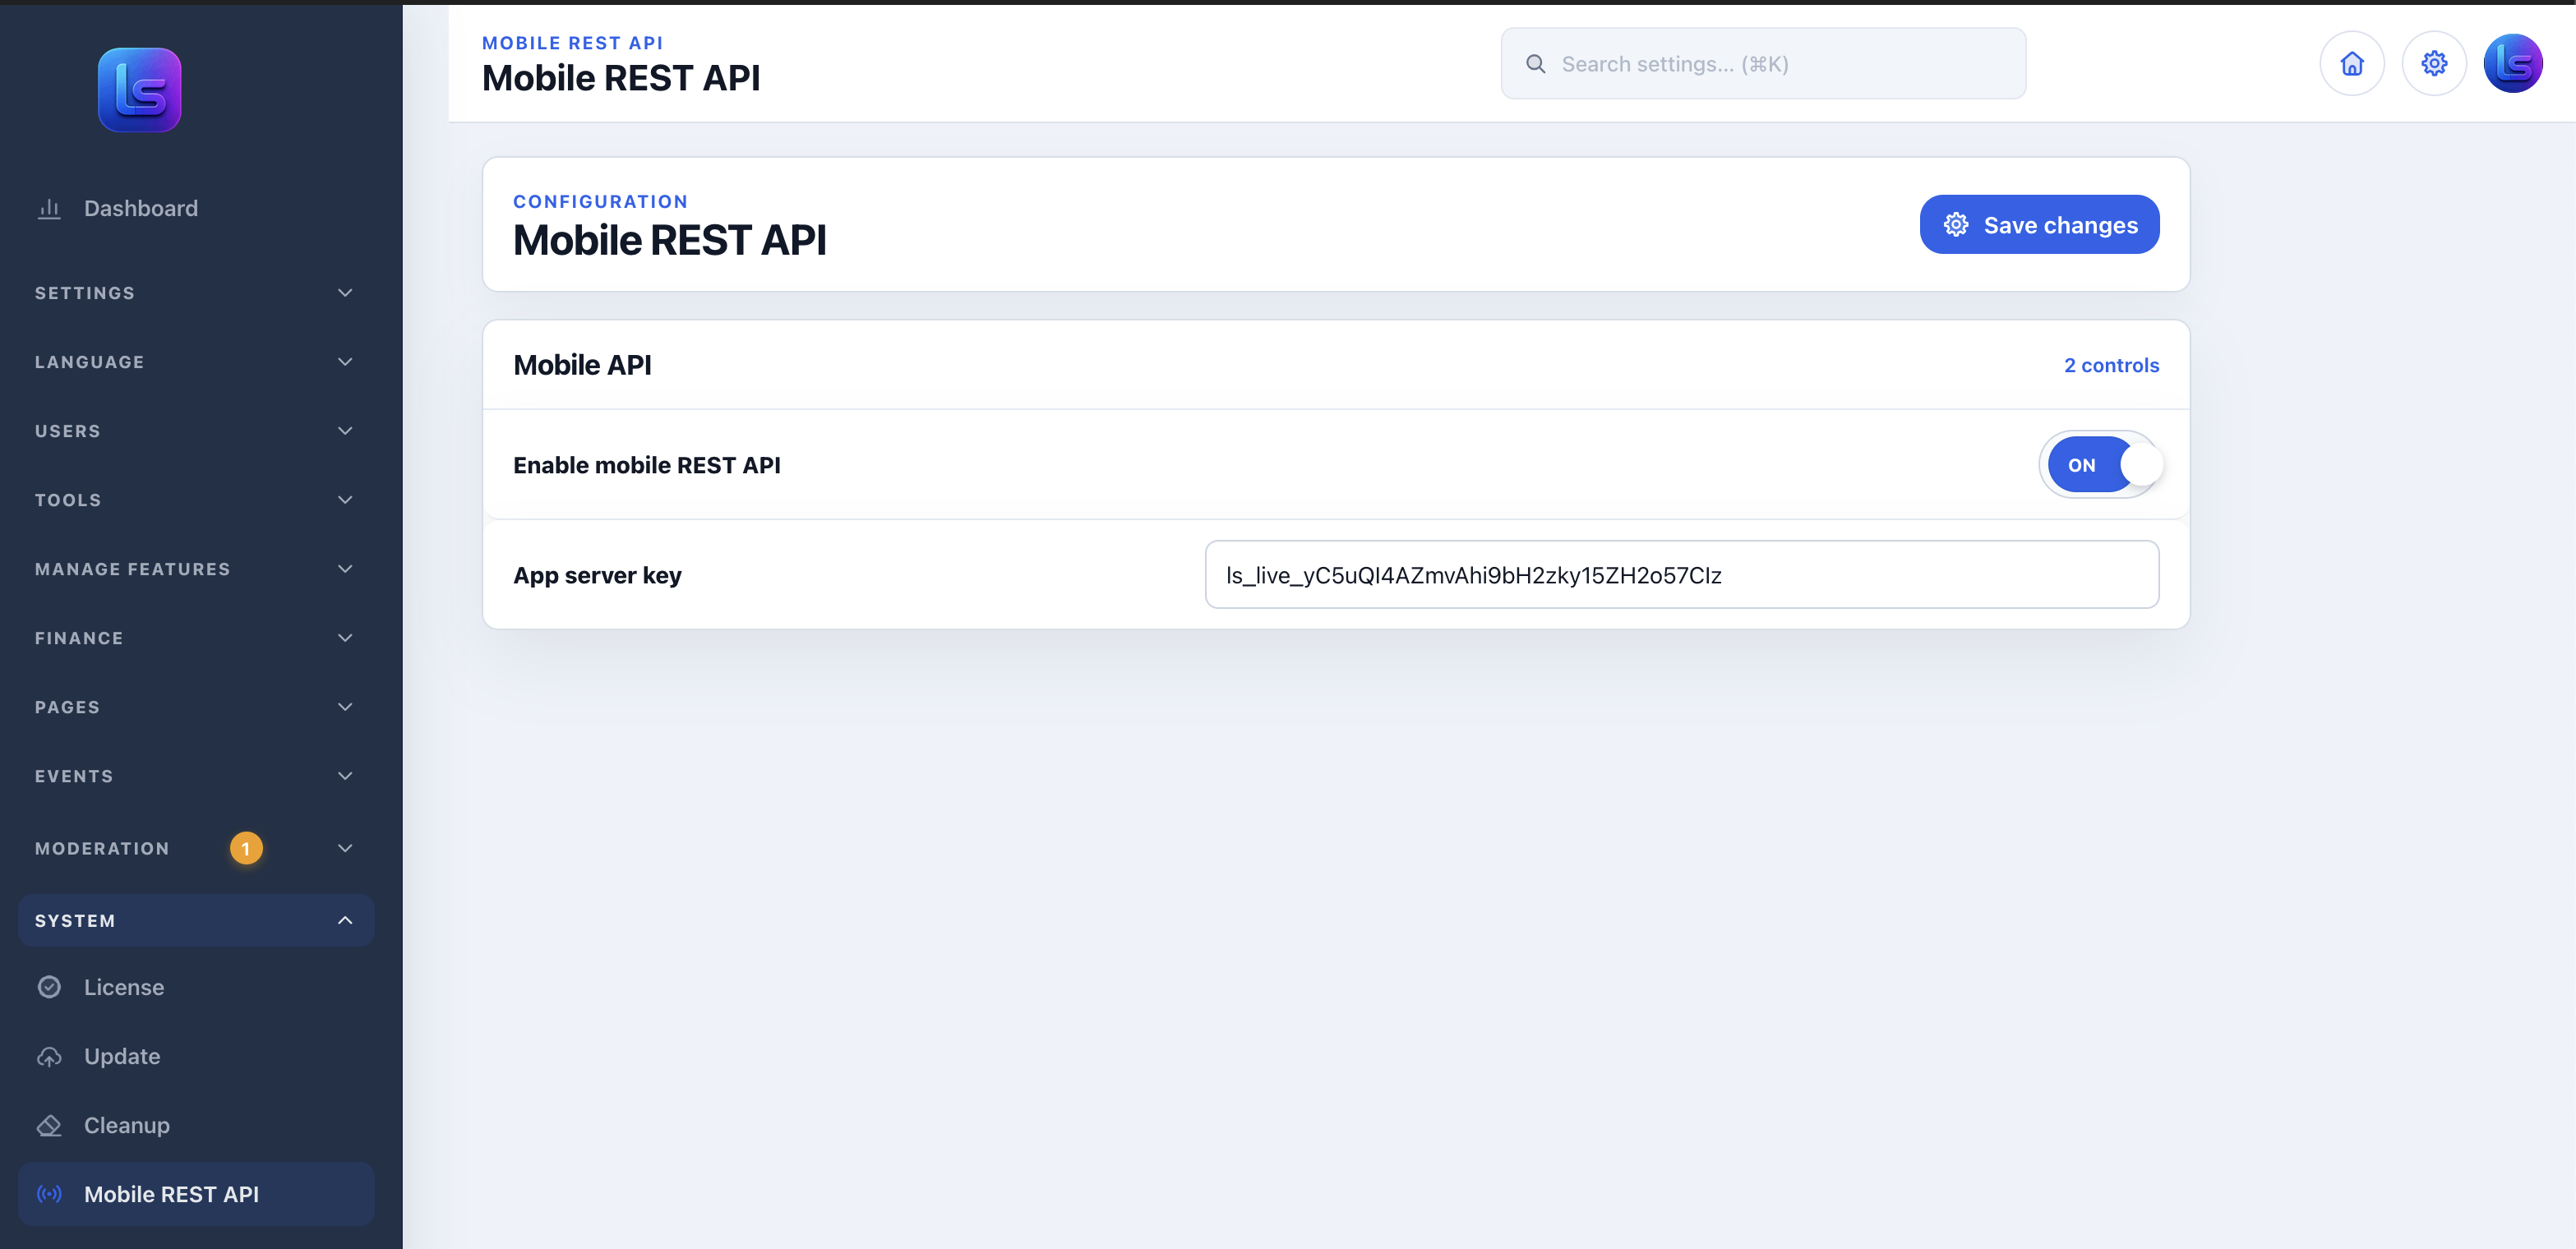
Log in as an admin, open System → Mobile REST API, turn on Enable mobile REST API, then save the settings.
Copy the server key
Copy the App server key shown on this page. It normally begins with ls_live_ and authorizes the app to communicate with your site.
Build and test
Configure the source, create an EAS build, and test login, feed, media upload, notifications, chat, calls, and payments against the live HTTPS website.
Configure the app connection
Extract the mobile source outside your website's public web root. From the project folder, copy the environment template and set the following values. The extracted folder may be named mobile; use the folder name supplied in your package.
cd "Mobile App"
cp .env.example .env
npm install| Environment value | What to enter | Example |
|---|---|---|
EXPO_PUBLIC_API_BASE_URL | Your LaraSocial site root with HTTPS and no trailing slash. | https://community.example.com |
EXPO_PUBLIC_SERVER_KEY | The App server key copied from Mobile REST API settings. | ls_live_... |
EXPO_PUBLIC_APP_NAME | The name shown beneath the installed app icon. | My Community |
APP_SLUG / APP_SCHEME | Short, lowercase identifiers for the EAS project and app links. | my-community |
IOS_BUNDLE_ID / ANDROID_PACKAGE | Permanent lowercase reverse-domain IDs for app stores. | com.example.community |
.env and the App server key private. Do not upload them to public hosting or commit them to a public repository. If a key is exposed, replace it in the admin panel and rebuild the affected app.
Recommended build workflow
Use EAS Build for the simplest production path. Create an Expo account, install Node.js 18 or 20 and the EAS command-line tool, then sign in and link the project. Do this once for each customer-branded app.
npm install -g eas-cli
npm install
eas login
eas init
Android
Run eas build -p android --profile preview for an installable APK. Use eas build -p android --profile production for a Play Store AAB.
iOS
Run eas build -p ios --profile preview for the iOS Simulator. A real iPhone, TestFlight, or App Store build needs an Apple Developer account and production.
Build an Android APK and publish to Google Play
Create a test APK
Run the preview build below. EAS gives you a download link for an installable APK, ideal for testing on real Android devices before publishing.
eas build -p android --profile previewProtect the signing key
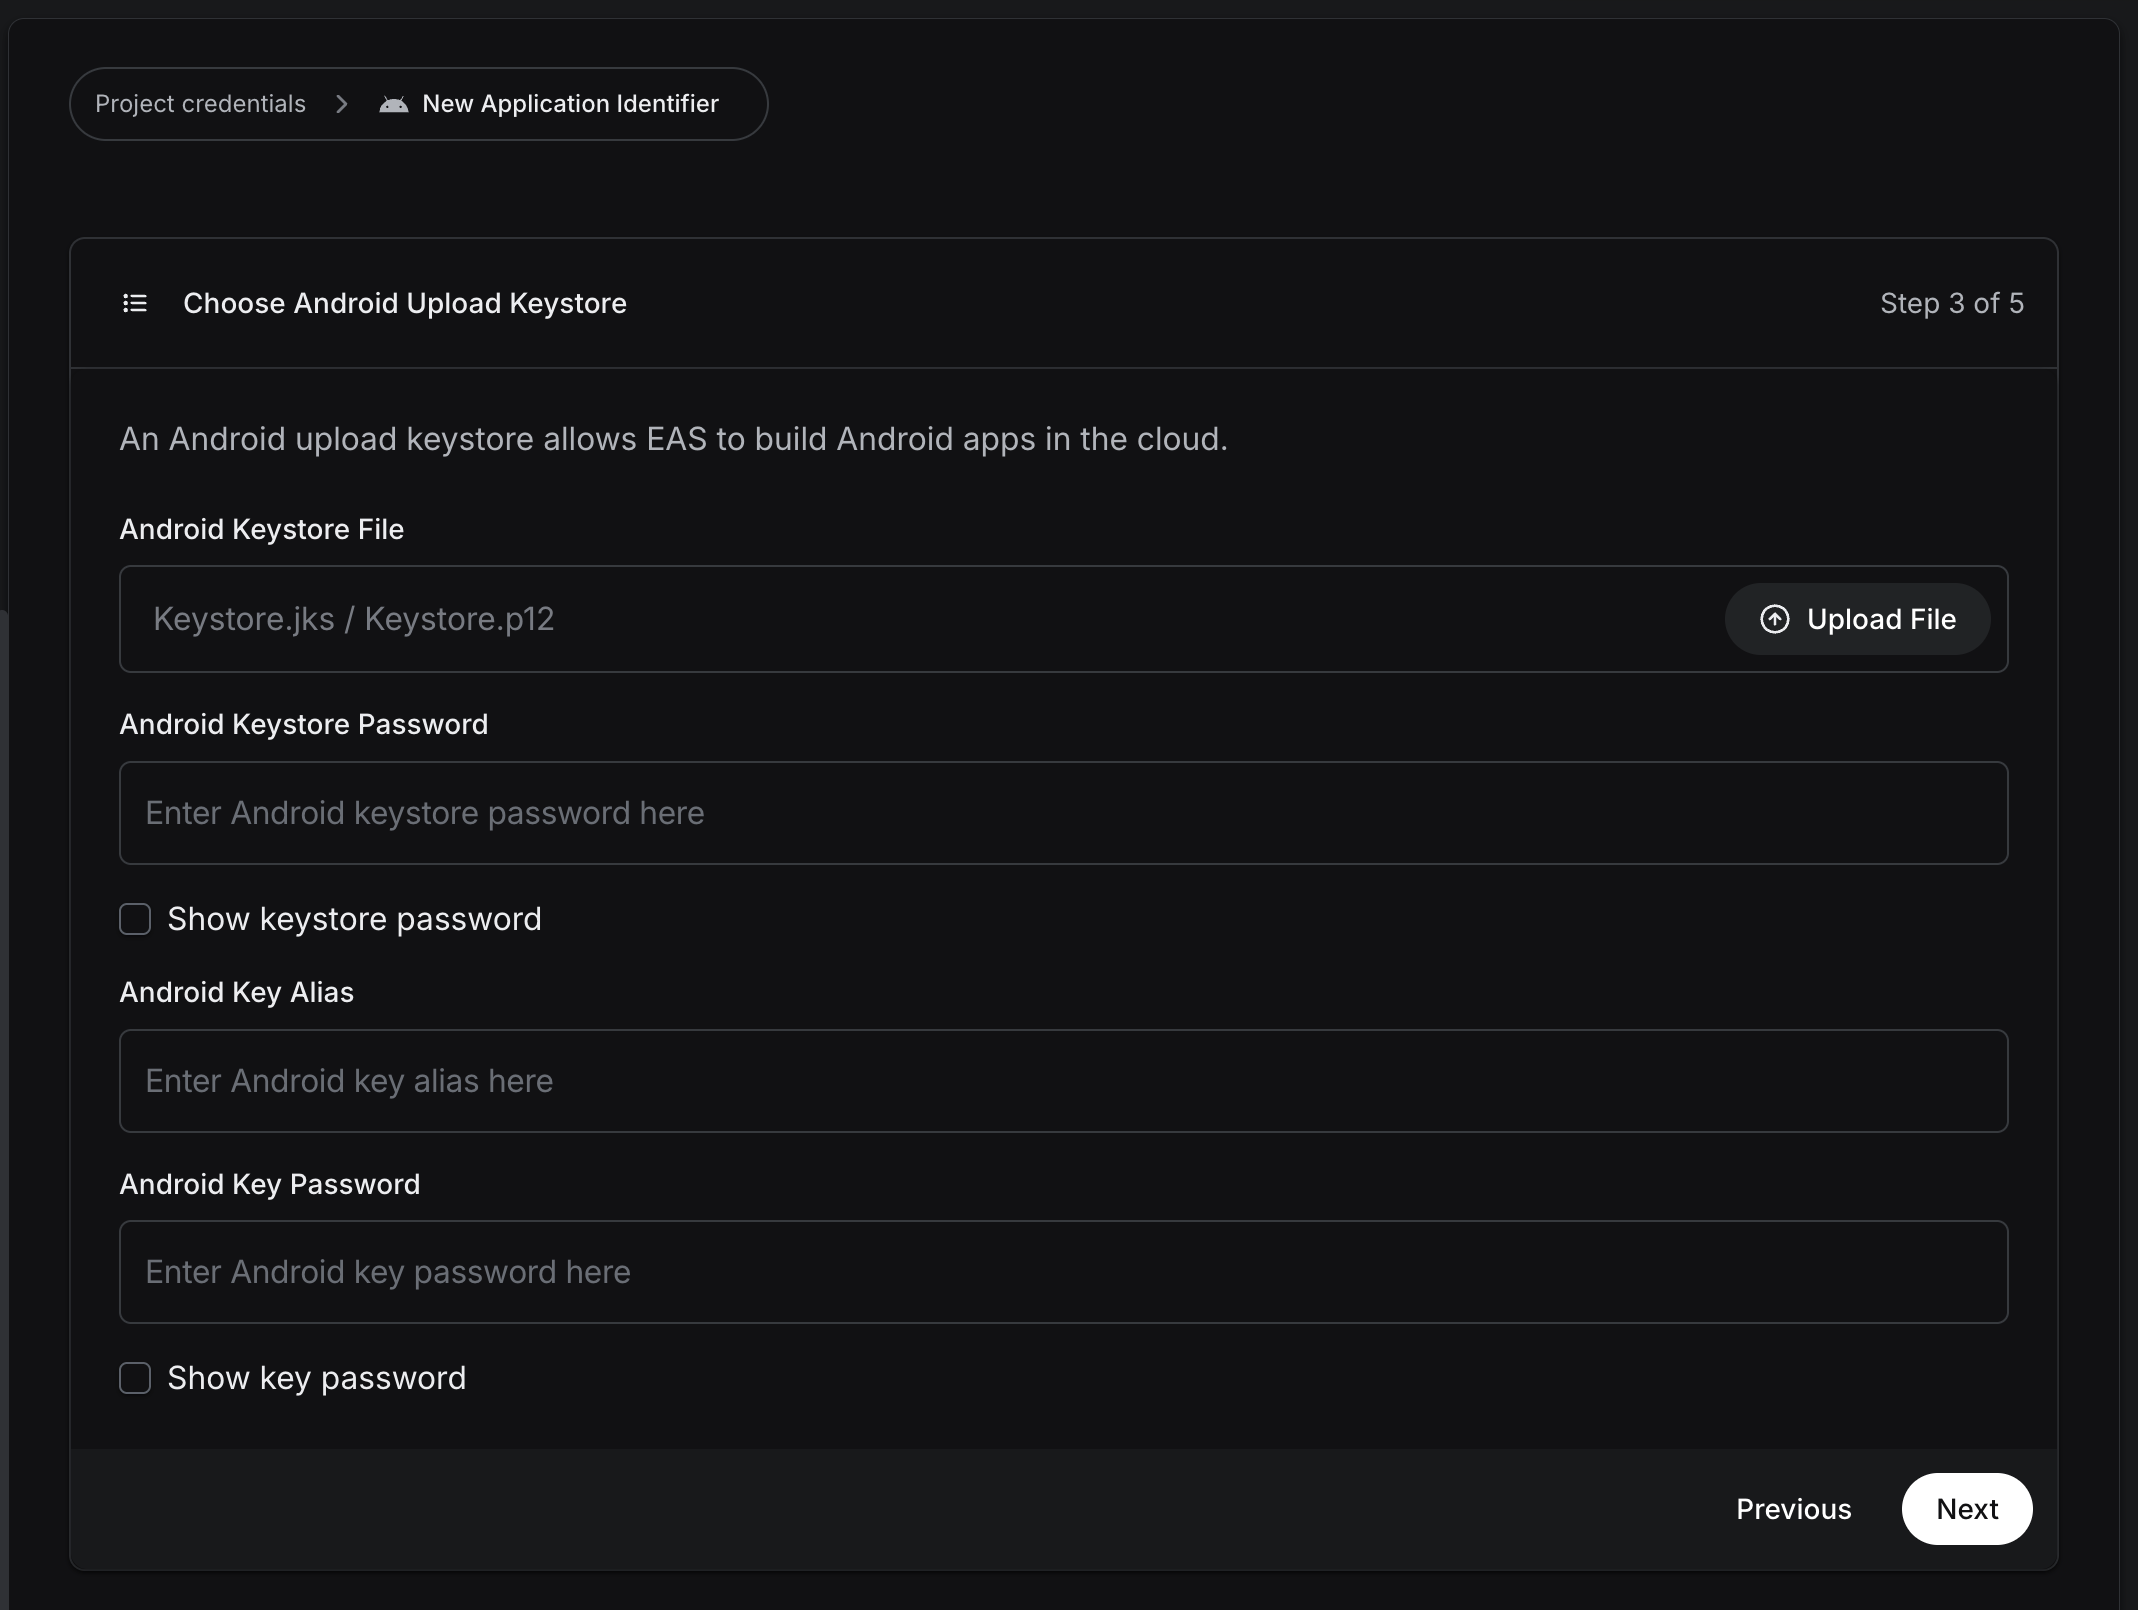
Let EAS generate and safely manage the Android keystore on the first build, or upload an existing keystore only when you are continuing an already-published app. Never lose a production signing key.
Create the store bundle
When device testing is complete, create the production Android App Bundle. Google Play requires an AAB for new public apps; the APK is for direct or internal installation.
eas build -p android --profile production
eas submit -p android --latestRelease through Play Console
Create the app record with the final package name, complete the store listing, privacy and data declarations, then use Internal or Closed testing before a production rollout. Increase the Android version code for every later upload.
Build an iPhone app and publish to the App Store
Prepare Apple ownership
Join the Apple Developer Program, choose the final IOS_BUNDLE_ID, and create an App Store Connect app record with the same bundle ID. That identifier is permanent once the app is in the store.
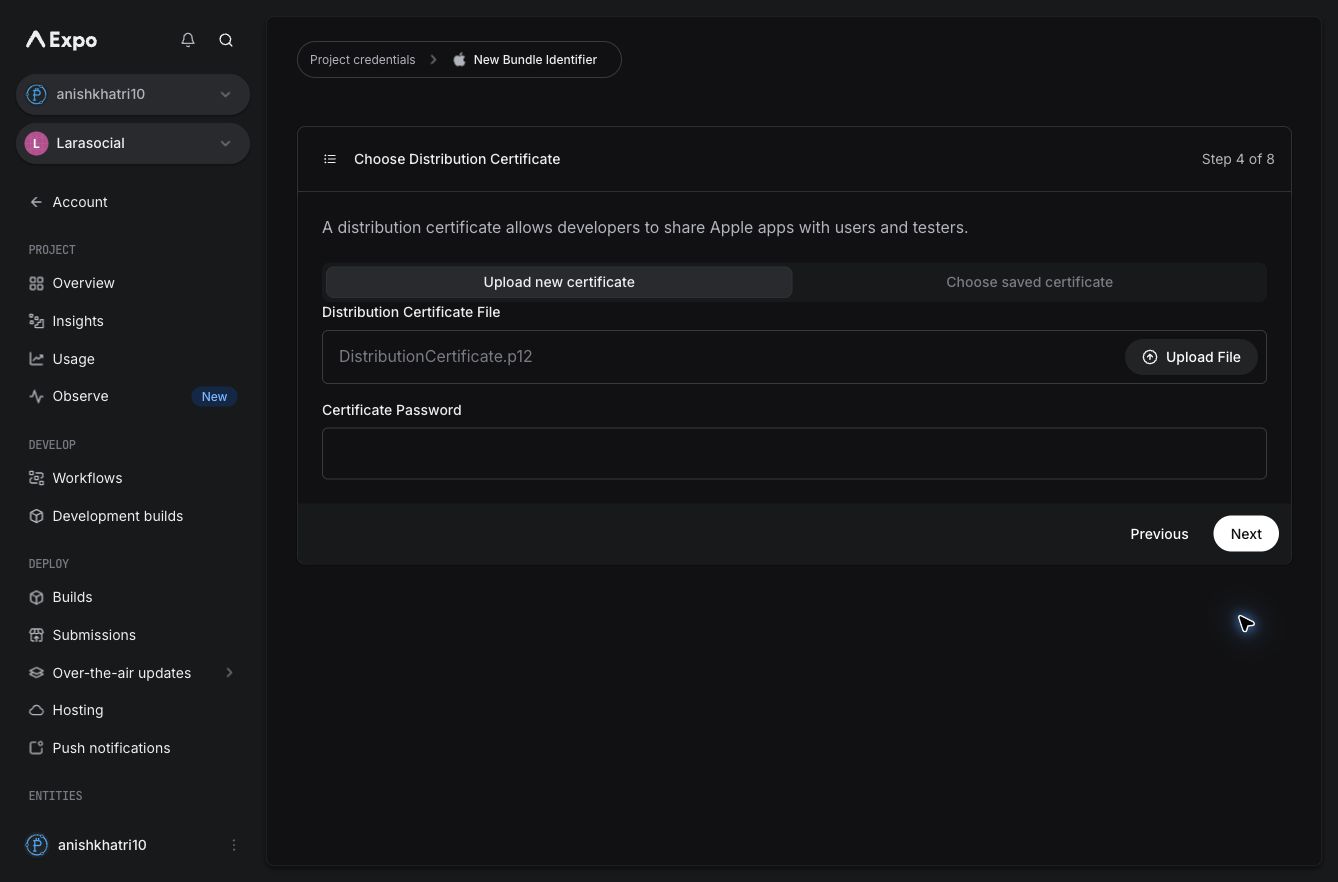
Let EAS configure signing
Build with the production profile and follow the EAS prompts for the Apple distribution certificate, provisioning profile, and APNs key. Use the customer's Apple account, not a demo account.
eas build -p ios --profile productionTest with TestFlight
Upload the build, add internal testers first, then invite external testers once the build is available. Confirm sign-in, posting, chat, media upload, notifications, account deletion, and every enabled paid feature on a real iPhone.
eas submit -p ios --latestSubmit to App Review
In App Store Connect, complete the product page, pricing and availability, privacy details, support URL, privacy-policy URL, review contact, and a working review account if login is required. Select the tested build, add it for review, then submit.
Branding, features, and services
- Most colors, name, and logo are read from the website at runtime. For fallbacks, edit
branding.config.tsandtheme.config.ts. - Replace the assets in
assets/without changing their file names: app icon (1024 x 1024), adaptive icon (1024 x 1024), splash screen (1284 x 2778), notification icon, and logo. - Leave module overrides set to
autoso the mobile app follows the modules enabled in the LaraSocial admin panel, including feeds, reels, stories, live, music, games, blogs, forums, wallet, and AI. - For push notifications, create a Firebase project for Android, add
google-services.json, upload the FCM V1 credentials through EAS, then rebuild. iOS push credentials are configured through Apple/EAS. - Configure optional Google, Apple, or Facebook social login in both the mobile
.envand LaraSocial admin panel. Keep the fields blank to hide providers you do not use. - Expo Go is not supported for this package because it uses native modules. Use a real EAS development or production build instead.
Mobile App/BUILD_GUIDE.md in the delivered source package.
Mobile build FAQ
The app shows a 403, cannot connect, or login always fails.
Confirm the site uses HTTPS, EXPO_PUBLIC_API_BASE_URL has no trailing slash, Mobile REST API is enabled in admin settings, and EXPO_PUBLIC_SERVER_KEY exactly matches the App server key. Rebuild after changing the environment file because standalone apps embed these values at build time.
Why does Expo Go not open the app correctly?
This package uses native modules for capabilities such as notifications, calls, and WebView. Expo Go is not the supported test method. Use an EAS preview or development build on a real device instead.
What is the difference between APK, AAB, IPA, and TestFlight?
An APK installs directly on Android for testing. An AAB is uploaded to Google Play, which creates device-specific APKs for customers. An iOS production build is uploaded to App Store Connect, and TestFlight is Apple's controlled beta-testing channel before App Review.
EAS says credentials are missing or asks for a keystore/certificate.
For a new app, allow EAS to create managed credentials while signed in to the customer's Expo and Apple accounts. Import a keystore or certificate only when updating an existing store app. The Android package and iOS bundle ID must be exactly the identifiers used by that store record.
Google login shows DEVELOPER_ERROR or returns to the login screen.
Create separate Google OAuth clients for web, Android, and iOS. The Android client must use the final package name and the SHA-1 from the same EAS signing key; the iOS client must use the exact bundle ID. Save only public client IDs in the mobile environment and configure the web client secret only in LaraSocial admin settings.
Push notifications do not arrive.
On Android, add a matching google-services.json and upload the FCM V1 service account through EAS credentials. On iOS, use an EAS-signed build with the customer's Apple Developer account and APNs credential. Then log in on a physical device, allow notifications, and send a test notification.
Apple rejects the App Store submission or asks for more information.
Provide complete privacy details, a public privacy-policy URL, a visible account-deletion path, support contact, and clear App Review notes. If the app requires login, give the reviewer a working test account and explain any features that need special setup. Test every declaration and link before resubmitting.
Can we ship a change without making a new store build?
JavaScript-only changes may be delivered with an Expo OTA update when the existing app is configured for it. Any change to native dependencies, permissions, icons, bundle/package IDs, deep links, or app configuration requires a new EAS build and, for public users, a new store release.
Updates and changelog system
LaraSocial updates are served from larasocial.app only after the customer installation sends a valid Laravex license for the correct product and domain.
License checked
The customer server sends the license key, current domain, product ID, and installed version. LaraSocial verifies the license with Laravex before returning update metadata or a package.
No version skipping
If a site is on 1.1 and releases 1.2 and 1.3 exist, it must install 1.2 first, then 1.3. The release server enforces the chain.
Safe package flow
Packages include manifests and checksums. Customer installs should backup, stage, verify, copy files, run migrations, clear caches, and then bump the installed version.
https://larasocial.app/api/updates/check{
"license_key": "YOUR_LICENSE_KEY",
"domain": "your-domain.com",
"current_version": "1.2.0",
"product_id": 11
}https://larasocial.app/api/updates/download{
"license_key": "YOUR_LICENSE_KEY",
"domain": "your-domain.com",
"current_version": "1.2.0",
"version": "1.2.1",
"product_id": 11
}Publishing releases from the product repo
Release operators can publish a chained update zip to the release server. The release metadata automatically powers the public changelog when the release is published.
https://larasocial.app/api/updates/publishHeaders:
X-Update-Secret: YOUR_RELEASE_SECRET
Form data:
package=@larasocial-1.2.4.zip
version=1.2.4
previous_version=1.2.3
title=LaraSocial 1.2.4
content=<ul><li>Release notes...</li></ul>
status=publishedProduction security checklist
- Force HTTPS and set the production
APP_URLto the final domain. - Change seeded passwords, remove unused admin accounts, and enable stronger authentication policies.
- Protect
.env, backups, update packages, logs, and storage directories from public web access. - Remove or block installer access after successful installation.
- Schedule database and media backups before enabling automatic updates.
- Store SMTP, OAuth, payment, AI, storage, push, and update secrets outside public code repositories.
- Review report queues, blocked words, marketplace moderation, and public registration settings before launch.
Troubleshooting
Production shows HTTP 500 after upload.
Check the Laravel log in storage/logs, confirm the contents of script/ were uploaded to the web root, rename htaccess.example to .htaccess, verify .env exists, clear cached config, and confirm database credentials are correct.
SMTP test fails.
Verify host, port, encryption, username, password, sender address, and DNS records. Try port 587 with TLS or 465 with SSL/TLS. Some shared hosts block outgoing SMTP ports.
Videos upload but thumbnails or conversion fail.
Confirm FFMPEG and FFprobe paths, executable permissions, PHP disabled functions, queue worker status, and upload limits.
Social login redirects back with an error.
Match the callback URL exactly in the provider dashboard, use HTTPS, confirm client ID/secret, request email/profile scopes, and clear cached config after changes.
The update center says a version cannot be skipped.
This is expected. Apply the next available chained release first, then check again for the next version.
Support checklist
When asking for help, include the domain, installed version, PHP version, hosting type, screenshot of the failing page, and the relevant error text from storage/logs/laravel.log. Do not send passwords, private keys, payment secrets, SMTP passwords, or full license keys in public chats.
Social login setup
Create OAuth apps with each provider, copy the client ID and client secret into LaraSocial admin settings, and add the correct callback URL in the provider dashboard.
https://your-domain.com/auth/google/callbackhttps://your-domain.com/auth/facebook/callbackhttps://your-domain.com/auth/twitter/callbackhttps://your-domain.com/auth/linkedin/callbackhttps://your-domain.com/auth/{provider}/callbackOAuth checklist